
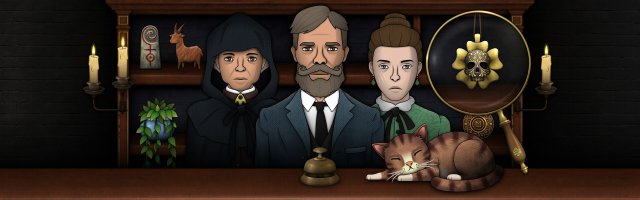
A Novice Thaumaturge’s Guide to Strange Antiquities
So, your boss and mentor skipped town, and now the clientele at Strange Antiquities has decided their problems are your responsibility. The shelves are filled with who knows what, you’re pretty sure a Fortifier is just an energy drink, and it’s only your first day! Fear not, as I’ve been there and have compiled a list of pointers to help you through to lunchtime, if not longer.

1. Take Your Time
Many games that revolve around running a store often have a certain level of rush to them; there is a finite amount of time per day, and you need to be efficient to maximise your profits. Not so in Strange Antiquities!

Instead of receiving as many customers as time allows, you’ll have a set number of visitors per day, all with their own needs and mysteries. The citizens of Undermere have very little to do, so they’re more than happy to stand about as you look through your tomes of knowledge.
You can even head into town, visit a tomb, and play with your cat Jupiter, and they’re still there! Strange Antiquities is all about the puzzles, so take your time and do your research.
2. Don’t Sweat It
The thaumaturgic items you provide are, in a word: strange. The descriptions in your tomes are vague, the customers have no idea what they want, and sometimes you may not even have the darn thing in question! All this considered, it’s pretty easy to make a mistake.
Luckily, the denizens of Underemere are seemingly well-versed enough to know when you’ve handed them something they do NOT want, so there is no risk of sending someone looking for luck away with the Cursed Idol of Wet Socks. If you do get it wrong, the only setback is an increase in your Dread.

You may still be worried about filling the meter, however, and that’s completely understandable! No one wants to restart the day, after all. Thankfully, a filled bar is not an automatic redo; instead, you’ll play a simple dice game that is pretty easy to win, taking you back to your current customer with nary a drop of Dread to be found.
If you’re feeling unsure or are waffling between a few options, take the risk and try one out! It’s okay to mess it up every now and again.
3. Gems, Signs, Symbols, and Gut
The main goal of Strange Antiquities is to identify the various knick-knacks, tchotchke, and accoutrements that line your shelves. However, this task can be easier said than done, as many items in your stock look similar and fulfil the descriptions for many talismans.

When faced with this predicament, I have noticed that taking a closer look at the item will net some answers. What material is used, and does it have a gemstone on it? Is there a symbol on the item, or does the object itself resemble one? Cross-referencing any additional details with the books you have may give you that much-needed nudge to choose between possible charms.
If nothing seems to give you a definitive answer and you’re completely lost, sometimes listening to your gut is the way to go. If nothing else, that's one wrong choice eliminated!
4. A Time and a Place
Once the map of Undermere is opened up, you may have the instinct to explore every nook and cranny of your home town. If you try this, however, you’ll quickly find that Strange Antiquities does not take kindly to dilly-dallying.

If you visit an area without reason, more often than not, you’ll receive a message along the lines of “this was a mistake”, and your Dread will increase. While you can visit some areas, such as Strange Horticulture, without risk, the majority of the map is meant to be explored when the game tells you to.
The same can be said about many of the tools and cubbies of the store. The big table under the desk, for example? It has its uses later. Strange Antiquity will tell you when and where to go most of the time, so don’t sweat exploration too much.
5. The Moon Haunts You!
There are a few instances where you will be presented with an image of the Moon in one of its many phases. These puzzles can be a bit confusing if you haven’t figured out one of the many secret devices of the shop.

There is a slightly off-coloured button on the top-right of the clock on the wall. By pressing it, you will be shown our lovely Luna in one of its phases. Now, pull on the pendulum and voilá! The Moon is now in another phase; by using the pendulum and the button, you can find the correct phase and its correlated time of day. Notice how the mural of the moon has twelve buttons around it?
And there you have it! I hope these small hints manage to get you started running your very own shop of thaumaturgic knick-knacks. Did we miss anything? Do you have any secrets or strategies to share? Let us know in the comments!


COMMENTS