Whateverland Full Guide (Good Boy Run)
So it's time to do the Good Boy run and be the very best Vincent you can be! Although that means helping a lot of nefarious personalities sprawled across Whateverland, this run is far easier than the Thief run, featuring less complex puzzles but also, sometimes, longer interactions between characters. If you're stuck trying to figure out how to complete something whilst remaining good, then this is the guide for you!
This guide will focus solely on the Good Boy run for Whateverland, and I will be splitting it into different sections for each character and helping them with their issues.
NOTE ABOUT PATHS: So long as your choice in the game does not have either a sun or a moon, it does not affect your overall "karma". This was confusing when passing the "Good Boy" vsion of Harold, and I needed to steal to get a good result. Don't panic if you have to do an otherwise "bad" action to do something good.

Before we start, it's worth noting that to get the "Good Boy" ending, you have to talk to a lot of people throughout Whateverland and choose friendly options so that Nick likes you at the end and chooses to befriend you. Not doing so will make him indifferent towards you at the end and net you a neutral ending. To achieve this, simply exhaust all dialogue from the people you are interacting with and choose friendly options; you shouldn't need to talk to anyone else outside of this.
Harold

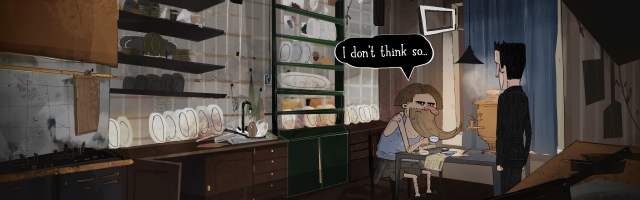
The first person you'll need to help out throughout your journey into Whateverland is none other than Harold. He's trying to repair a helicopter to go see his goddess, Beatrice, so you'll need to help him get a rudder and free Nick in the process.
When you talk to Harold and he tells you he needs a rudder, offer to help him out and head far left, where you'll find Eddie the raven. From here, you'll need to continue interacting with Eddie until you get the choice "Are you sure you can't give me the rudder?" option. If you lie to him and tell him you won't give it to Harold, Eddie will end the dialogue but will open the correct answer the next time you talk to him.
Once you've been able to select the correct one, you'll need to head back to Harold and get the cheese from him. Whether you convince him by lying to him and telling him that the Goddess' will is for you to receive the cheese or get Nick to distract him by singing whilst you steal, it is up to you.
Return to Eddie with the cheese and give it to him. Then, as soon as you have the rudder, return to Harold and give him the rudder to receive the key. This should now allow you to free Nick with the key and complete Harold's quest by helping him.
Ellen

To help out Ellen, you'll first need to talk to her and let her "convince" you to help out with the radio tower. By heading upstairs to the top, you'll find Harold's tape recorder alongside the "Instructions" cassette — you don't really need to listen to this.
Before you can align all of the radio towers, you'll first need to go to the park, where Hilda is using one of the towers to create her very own makeshift sun. Once you've spoken to her a bit, you'll unlock the "I need to fix the radio tower. But that means giving up your 'sunlight'." option. To convince her to let you realign the tower, you'll need to beat her in a Bell & Bones match. It's worth noting that cheating here with a yarn ball is wholly okay and will not ruin the Good Boy run, so if you hate Bell & Bones — or can't be bothered to defeat her — you can safely cheat without any issues.
After defeating Hilda at Bell & Bones, you'll need to go back to the top of the radio tower and align all of the dishes to do an entire circle without them interlapping or touching the red zones. Follow the image below for the layout I use, or feel free to try to create your own!

Louis

Excuse me, WHAT?
To get Louis' attention, you'll first need to get access to him. To do this, you'll need to talk to his security guard and follow the dialogue until Nick suggests talking to the band, after which point you'll need to go to the staff room and talk to the jazz band, who will inform you that they need an extra player and that there are spare instruments in the closet.
Going inside the closet and interacting with the guitars, Nick will ask you if there is a plan. Choose the "Don't worry. I just want to impress him, so play as well as you can." option to start the Good Boy path to complete Louis.
Once you leave the closet, you'll enter a menu that'll allow you to customise the song that the band plays. Although you could put effort into making a decent song, you can, alternatively, just fill in one of the instruments and call it a day — Louis isn't picky, apparently.

Queue an extremely long saxophone solo.
Talk to Louis and confess that you want something from him, after which he'll make his request (as all Whateverlanders seem to do) — he wants to go on a date with Fida. Go to the Arabesque, speak to Fida behind the counter, and convince her to go on a date with Louis.
How you make the date go is entirely up to you — even if you get the worst possible ending between Louis and Fida, Louis will keep his end of the bargain and give you his piece of the spell. So choose how your heart desires and play Cupid with their relationship!
Van

Before you can start Van's good route, you'll need to talk to him and hear about his problems with the ventilation system. He will moan about no one fixing it and tell you to talk to Zachary, who is in the kitchen. After doing this, go to the kitchen, talk to Zachary, and select the first option ("I have to fix your ventilation system, so your master gives me his piece of the spell. Any idea how I can do that?) and then select the "Got it. Let's hope it's fixable." option.
After this, head to the roof of the mansion — don't bother interacting with the schematics yet — and talk to Pipsqueak and ask him how to fix the air vents; he'll tell you you can't because his house is there, but that Zachary was building something to help. Go down to the attic once again, head into Zachary's room (the one on the right), pick up the Z-shaped pipe, and go back to Pipsqueak and change his house.
After this, you can interact with the schematics and start fixing the piping, but there's a catch — every room needs air. If you miss even one room, you'll need to start again, so you'll need to make intelligent use of your pipes in order to complete this puzzle. Once that's over, head on back to Van and speak to him to get your piece of the fragment... and witness a nightmare-inducing animation.
Oswald?

Haven't you heard? Rabbit food is witch catnip.
To get the piece of the spell from Oswald, you'll need to head to the Dark Alley and ask him for it... only, he gave it to Clawdia.
Go over to the Catlady's Place and talk to Clawdia to ask her about her piece of the spell, get a confession and... find out she gave it to "a grim guy with an ugly sweater". If you don't recognise this description, that's okay — head to the bridge and talk to Francois, as he'll be the one that has the piece of the spell.
Talk to Francois and say, "Do you know the cat lady, Clawdia?" and follow the dialogue until you get the option to choose the Good Boy path — "What if I find your tapes?"; this will start your scavenger hunt for Francois' tapes.

To find the first of them, you'll need to head left and speak to the fancy merman, Melman, on the shore and follow his dialogue until he makes you give him a tattoo. Giving Melman a tattoo is simple: pick from the colours and start drawing! The complexity doesn't really matter, so feel free to draw a dot and move on or create a masterpiece.
After finishing your magnum opus, Melman will go into the water and recover tape #4 for you, where you'll hear jazz music in the background, and Nick will tell you to check the Jazz Club.
In the Jazz Club, you'll need to talk to the barmaid, Adeline, and choose the dialogue option "Did you happen to find a tape here? Francois could have dropped it" (all of these choices will be signified by the sun for "Good Boy" run). She'll give you the tape, and then it's time to listen to it — this time, it'll lead you to the Arabesque.

Told you: magnum opus.
Here, you'll want to talk to Fida and, once again, ask her if she's found any tapes. Choose whichever option and Fida will give you the tape for you to listen to, which will guide you to the park.
This time, you'll want to talk to Hilda and ask her if she's seen a tape. She'll give you the final tape, and then it's time to return to Francois, who will promptly provide you with the spell fragment and end the quest.
Lily & Rose

Once you've heard Lily & Rose argue, you'll need to get them to reconcile. Each of the sisters has written an apology letter that they never had the heart to give, so you'll need to recover both of the letters and give them to the sisters. Whether you do Lily or Rose first doesn't matter, so I'll be focusing on Lily first.
Enter the room where Lily storms off and talk to her until she tells you about her apology letter. After that, you'll unlock the option "Do you still have that letter you wrote to Rose?" to start retrieving the one from her.
In order to get Lily's, you'll need to get her to leave the room. To do that, you need to head out to talk to Jeeves and select "I think I know a way to reconcile the sisters. But you have to help me." Head back to Lily and choose the option "Hey, Lily. Jeeves asked me to tell you that he wants to win his old monocle back." — this will get her out of the room, and it'll allow you to interact with the computer, Sam 9000.

"Die for something to not live for nothing!" — Dollar Store Rambo
This minigame can be relatively tough, and it isn't optional if you want to help everyone. Using your mouse, you can control the character and hit the armed men. This is basically a stealth minigame, but you get a checkpoint for each room you pass.
Once you've passed the first three rooms, you'll reach the final boss. Unlike the other soldiers, you need to defeat him by using the cannons around the room that are connected to a lever — whenever he stands in shooting range of one, press the lever and dodge the bullets he shoots out. I try to stick to the left side of the screen and manoeuvre his bullets accordingly, as he might get aggro if you get too close and punch you, leading to a death.
Once you've defeated the boss, Whateverland OS will boot, and you can double-click the letter to print it. Leave the room so that Lily comes back from her Bell & Bones match against Jeeves, enter again, and speak to her to choose the "Look what I found." option.

Still better than Windows 8.
Now, to help Rose, you need to talk to Jeeves and select the option "Do they always fight like that?", which will allow you to select "I wonder if I can try to reconcile them somehow. Do you have any ideas?" Jeeves will tell you about Rose's letter to Lily, after which you'll have to go to Rose and ask her about it with the "Jeeves told me about the letter you wrote to Lily. Why didn't you send it?" Once you've spoken to Rose and she's told you where the letter is (she used it as a bookmark from one of the books in Sylvie's library), you'll need to go to the library.
At the library, you'll need to follow the dialogue between Sylvie and Nick until the "Actually, we have a favor to ask of you." option appears. Again, follow the dialogue until you can select "Alright, let's see that novel of yours."
This puzzle is relatively simple: you need to make a dungeon for her with the sketch by selecting the corridors and areas and then furnishing them. Don't put goblins before you put a sword, lest the knight dies and you have to start again.

One knights versus 44 little girls — the most fearsome army.
Most layouts will do, though you'll need to make it a bit longer than the minimum amount of blocks you can put in order to have enough action for Sylvie to be pleased.
Go back to Rose and select "I'd like to show you something." She'll tell you to wait in the living room, and if you've already helped Lily, the cutscene should play, and the twins will reconcile, giving you the piece of the spell.
Umaru-san

Guess we're staying in Whateverland forever!
To get Umaru-san's piece of the spell, you'll need to cook her the "perfect" ramen — or at least one decent enough for her liking. Before you can start cooking, you first need to choose the "What can you recommend on the menu" option and then "If I cook for you the perfect ramen, will you give me your piece of the spell?"
Now, you need to convince Ichiraku to let you cook. To do that, you need to talk to him and select "What's Umaru-san's problem with your ramen?", after which he'll tell you about the golden tuna and that you can use his kitchen.
To find the golden tuna, you need to go to the Market and talk to Santiago in the far left side of the place — he is a short fisherman who will offer you a golden tuna for help. Choose the "Do you happen to have a golden tuna for sale?" and follow the dialogue until you can pick "Deal. That shouldn't be too hard." and help Santiago sort the fish.

Santiago's competitiveness rivals my own with fellow staff members!
There are several rounds of sorting you'll have to do before Santiago hands over his golden tuna, but there is a trick you can use to make this easier if you're struggling with sorting them quickly — by pausing the game, you can observe the fish that you're sorting without the timer going down. This trick will trivialise the minigame and ensure you can complete it with ease. Don't panic if you screw up, however, as the game doesn't punish you; instead, you just restart from your last batch.
Once you've finished with the minigame, you'll get the golden tuna and can go back to Uzu-ramen to cook the ramen for Umaru-san. Go to the kitchen, start the "How To Make Ramen" tape and follow it until you reach the special ingredient and insert the golden tuna — doing so earlier will lead Umaru-San to react as if you'd given her any other ramen and force you to make another. Once she's asleep, it's time to crack her safe.
After you finished the golden tuna ramen, head back to Umaru-san and choose the "[Give golden tuna ramen]" option and she'll give you the piece of the spell.
Ernest

Whether you've been a good boy or a thief, Ernest's section is the same. Talk to the guard and tell him that you have defeated all of the Bell & Bones champions, you have the six pieces of the spell, and wish to speak to Ernest. Afterwards, follow the dialogue with Ernest until he challenges you to Bell & Bones.
Truthfully, winning or losing has the exact same result, so if you're in a rush, abandon the match by clicking the X on the top-left of the screen. Getting him to score and win won't really make him win; you need to surrender to make it quick.
After you've won or lost, Ernest'll throw you in prison, but your choice on what you want to bargain, whether you tell him to free Nick or take Nick and let you go free, will determine the ending you get. At this point, if you've followed everything and been friendly, trying to defend Nick will unlock the Good Boy ending, but trying to sacrifice him will lock it.

Once Nick has freed you and Harold from prison, you'll need to go to the left to find the elevator and have Harold tell you to get the key from the crack. To create the fishing rod, you're going to need twine, a magnet, and a stick.
The twine is right beside Nick, and to get the magnet, you need to talk to the mice in the room, after which they'll ask you to give them wine. To get it, interact with the panel at the left and go to floor -1 and get the wine from the bottom right.
Before you leave this room, however, grab three handfuls of the millet on the floor and put them on the right side of the scale — this will open Ernest's hidden chamber, which has a stick (Elvis' microphone stand) and your lockpicks. After this, head back downstairs and give the mice the wine, and talk to Harold once you have all three items in your inventory. Pick up the fishing rod and take out the key.

*Insert Animal Crossing fish sound* "I got the keys! Does that mean we can get out of here, please?"
Once you're out and Nick has apologised for using you this whole time, you'll need to forgive him for his transgressions, and you and he will become close friends — once the credits roll, you should have the Good Boy ending.
That's it for Whateverland's good ending! The hardest part is definitely talking to everyone, but otherwise, it's a piece of cake gameplay-wise! If you have any questions, please don't hesitate to ask them, and I'll do my best to help.

GameGrin are proud to have all their articles researched, written, and edited by real people that care about gaming.


COMMENTS
Karlo Garcia - 05:20pm, 15th February 2026
Hola, buen día, seguí al pie de la letra tu guía, pero al final el pinche Nick no se disculpa ????