Whateverland Full Guide (Thief Run)
If you're looking to break into all of the safes around Whateverland and claim your throne as a master thief, then you've come to the right place! Whether you're stuck trying to crack Francois' 10,000 combination lock or trying to make Umaru-San fall asleep with alcohol so you can pickpocket her in the middle of the ramen restaurant, we'll help you out!
This guide will focus solely on the Thief run for Whateverland, and I will be splitting it into different sections for each character: how to get to their safe and how to crack it. This guide will also cover two additional puzzles you get for going the Thief run, though these are end-game and spoilers.
NOTE ABOUT PATHS: So long as your choice in the game does not have either a sun or a moon, it does not affect your overall "karma". This was confusing when passing the "Good Boy" version of Harold, and I needed to steal to get a good result.
Tool Explanation

Whenever you start cracking a safe, you'll be taken to a special menu with four tools at the bottom-right of the screen and a whole load of no explanations on how to manoeuvre. The most important thing is that you can zoom in with the scroll wheel and pan through the screen by holding the middle click. Without this, you'll never be able to complete the puzzles, which took me way too long to find.
Now, onto the tools. Each tool interacts with items that have the same shape as its mark. For the purpose of the guide, I will be naming them — from left to right — Lockpick, Hammer, Screw, and File.
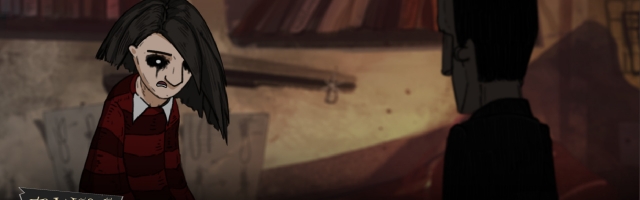
Harold

The first Whateverlander you'll be able to either help or betray who works as a tutorial is none other than our local crazy scientist, Harold. His quest is relatively simple.
To start on the evil path, you'll need to agree to help Harold by selecting "If I find you a rudder, will you give me the key?" and head to the far left to find Eddie the raven, who has the rudder. Go back to Harold and tell him you found the rudder and select the moon option (this will always be the "Thief" path), which says "You need this rudder, so you go get it yourself". Once you've made this decision, you'll be able to interact with the closet Nick's stuck inside, and solve the puzzle.
First, use the File on all six screws around the lock to pop out its case and show its insides. From here, use the Screw on the two screws on the right side of the lock that are covering a battery, and then use the Hammer to smash that and break the chain. Once the chain is melted, use the Lockpick on the brown object at the top of the lock and finish this puzzle.
Ellen

Ellen's piece requires you to convince her that she is a good singer, but to do that, you'll need to progress up until she asks you to help with her radio tower; you won't be able to make a "sun" or "moon" dialogue choice just yet. Head to the top of the radio tower and grab Harold's recorder atop the screen.
You don't really need to listen to Harold's tape, but instead, you'll want to run down to her room, grab the tape beside her (labelled "My Song") and listen to it near her. After this, she'll tell you to stop listening to it and your option to select "I think you're very talented" will unlock, which is the Thief route; she'll go to the recording room, and you'll need to crack her safe, which is the yellow Oscilloscope in the room.
To crack the Oscilloscope safe, you'll need to use the File tool on both the top-right and top-left corners, revealing two nails. Once you've dealt with that, the safe will open, revealing the rest of the puzzle.

The first thing you'll want to do is break the glass at the top to reveal some wires. The order that these wires should go in is at the bottom of the box, but this part of the puzzle is backward, as indicated by the upside-down smiley face drawn on the side. Use the indicators to connect the wires or follow the image to connect them in the correct order for the display to show the desired wavelength.
To acquire the necessary wavelength, you'll need to turn on the lightbulbs at both ends (the first lightbulb and the sixth) by using the Screw to turn the interactable object below each one. The rest have to be turned off.
Once you've turned on everything and the indicator wavelengths are active alongside the wavelength you are interacting with (the ones that glow brighter), you'll want to set the amplitude to three and the frequency to six and a half (throwing towards seven). Once that's done, the piece of the spell will automatically appear on the side of the Oscilloscope, and you'll be ready to finish this part.
Louis

To get Louis' attention, you'll first need to get access to him. To do this, you'll need to talk to his security guard and follow the dialogue until Nick suggests talking to the band, after which point you'll need to go to the staff room and talk to the jazz band, who will inform you that they need an extra player and that there are spare instruments in the closet.
Going inside the closet and interacting with the guitars, Nick will ask you if there is a plan. Choose the "Actually, there is something I want you to do..." option to start the Thief path to complete Louis.
Once you're inside the VIP Lounge, interact with the Saxophone case on his couch. To open the case and unlock the puzzle, you'll need to click the jazz buttons in order of oldest to newest:
- Sanremo
- San Francisco
- Quebec
- Chicago Jazz
- Jurmala Music Waves
- Paris
- Reyjavik
- Moscow

Once you've done this, the puzzle will reveal a large saxophone. First, you'll want to unscrew the things in the middle of the case with your Screw to reveal an area to build a new instrument. Pick up the two items in the top left — the flask with lips and the brush — alongside the item in the bottom left.
To start building the instrument, you'll first want to use the Screw to take out the golden part from the saxophone and put it in the other instrument and use the Hammer to break the glass on the bottom left. Once you've done that, use the Lockpick to pull out a piece that will show you how to set up the part you just put in the new instrument: Open, Closed, Open, Open, Closed.
Set the mouthpiece in the hole of the middle right of the case and use the mouth-looking vial to blow wind into it, which will open a slot at the very left side of the case.
To interact with that item, you'll want to use the brush on the bell of the saxophone to get the triangle-shaped key and place it in the hole, which will reveal the spell fragment.
Van

To start Van's Thief route, you'll first need to listen to Van complain about the air ventilation. Once you do that, you can talk to Zachary in the kitchen and select "Maybe you could just tell me where Van keeps the spell?" and the rest of the conversation should lead to how to get around Van, regardless of your choices.
Zachary doesn't exactly tell you how to get Van to sleep — you need to figure that out yourself; you'll need to head to the roof of the building by going up the stairs, up the ladder, and then up the second set of the ladder and talk to Pipsqueak, the high rat in the corner. The second option will be the "Hey, is there a way to neutralize Van somehow?", which will allow you to pick up the sedative gas from the left.
From here, you need to go down into the schematics of the vent in the second floor and place the gas cylinder on the top-right area of the top-left room. Once you've done that, you'll need to reroute the gas to connect directly to Van by using the pipes. Once you leave the schematics menu, a short cutscene will play where Van falls asleep, and you can head to the grandfather clock behind him to begin cracking his safe.

First, you'll want to use the Lockpick and interact with the hole in both the black and white swans' wings to get two items — a liquid and a lantern — to use later. Afterwards, use the Lockpick whilst you still have it picked up to interact with the swinging of the clock and stop it.
Grab the Hammer and break open the cracked part above the pendulum and get the two coin.
Drag down to the bottom of the grandfather clock and unlatch the doors to reveal a complex system inside of the clock. Use the Screw to unscrew both screws in the ICE box and click without any tool on the bottom container to open it. Use the liquid we got earlier to fill this in and close the ICE box.

Click the button in the ICE box until it is in five, put the coin on the top-left part of the contraption beside the ICE box, and on the door to the right, select the numbers one and four of liquor.
Finally, scroll all the way to the top where the clock is, file the centre, and use the Screw to change the time to 9:30 by interacting with the screw 38 times.
If you did everything properly, a ballerina should come out with the spell fragment.
Oswald?

To get the piece of the spell from Oswald, you'll need to head to the Dark Alley and ask him for it... only, he gave it to Clawdia.
Go over to the Catlady's Place and talk to Clawdia to ask her about her piece of the spell, get a confession and... find out she gave it to "a grim guy with an ugly sweater". If you don't recognise this description, that's okay — head to the bridge and talk to Francois, as he'll be the one that has the piece of the spell.
Talk to Francois and say, "Do you know the cat lady, Clawdia?" and follow the dialogue until you get the option to choose the Thief path — "I don't have time for this. Do you mind if I crack it open?". Once you've chosen this dialogue, go where Francois puts the safe and begin cracking it.

There weren't zeroes, so I had to go for the second-best thing.
If trying to guess Francois' combination out of the possible thousands of choices sounds dreadful, then fret not! You actually need to take the third dial to the number seven and use your Hammer on it to break through it (against Francois' better wishes). After that, use the Screw to interact with the screw, and then use the Lockpick to interact with the two parts that come off subsequently.
Once you've done that, you'll need to use the File on the two revealed parts, use the Screw again to unscrew two screws, and this will reveal the final piece of the puzzle. Get the four red cassette tapes to be inside of the golden line by adjusting the blocks around; after you've succeeded, use the Lockpick on the contraption to the left.
Lily & Rose

Getting to Lily & Rose's safe is relatively simple — you don't even have to talk to either of the twins! Instead, you'll want to go and speak with Jeeves, the butler dog, and get him to tell you where they keep the safe by selecting "Do the sisters have some kind of safe where they keep precious stuff?".
Once Jeeves has told you where to go, go behind the broken curtain to the right of the room and interact with the painting in the far right with the jester. To complete this section, you'll need to help the jester from the painting reach the far left.
DISCLAIMER: This section can be very buggy, so your paintings might freeze. Quitting and restarting the game will allow you to start the quest over again, in case any of the malfunction.

I saved too much, I admit it.
- You'll need to give him the bag on the top left by clicking on the red valve-like wheel that's connected to it.
- Interact with the valve connected to the meat to get the jaguar to the painting directly below the meat, and when it starts eating it, interact with the valve to turn it and trap the jaguar.
- To get the dark knight out of the way, shake the berry bush above him to give him a lot of berries, giving him a belly ache and moving him to the painting with the porta potty
- To get through the ship, interact with the valve of the painting on the top left twice to turn it 180 degrees and reveal a bell. Once you do that, click the painting with the golden cannon to shoot and bring out the pirates.
- The painting with the golden cannon will drop, pointing towards the pirates. Interact with it again to scare them off.
- Interact with the bees to get them to make the lady with the seeds drop them and then interact with the red valve connected to the lake painting to grow them.
Once you've completed all six steps, you'll have reached the end and will be able to interact with the P.I.G. (Protective Interactive Gear) safe.
First, use the File to break the two golden, circular areas and then use the Lockpick to interact with the hole left behind. Once that's done, use the Screw to remove two screws from the locks, which will pop them out and reveal the insides. Continue using the screws on the biohazard symbol case and then use the Hammer to break the battery to break them and open the safe up.
The safe inside will have four different puzzles at each square on the doors; you have to use the Screw to release all of these.

In the top-left puzzle, you'll need to unscrew the circular thing to reveal a tumbler. To complete this, you'll need to bring all of the notches down in order — the correct order is three left, two right, three left, and four right. This should open the two cages, and you'll be able to take the two pieces.
In the bottom-left puzzle, you need to put the three red pieces inside of the spinning dial in the middle. The two pieces that are cut in half go together inside the long line of the spinning dial, and the rectangular one goes on the other side. Once everything is in place, the two cages will open, allowing you to take the two pieces.
For the top-right puzzle, all you have to do is use the Hammer to break open the glass and grab the piece inside.

For the bottom-right puzzle, you have to lure the fly inside the glass cage to fly to a piece of food. To complete this part of the puzzle, unscrew the bottom-left square with your Screw to reveal a chocolate piece, use the Hammer to break the glass that's covering the fly, and then put the chocolate inside. The fly will go eat it, and you can grab the piece behind bars.
Put the pieces you got from the four puzzles in their relevant positions — use the shapes to determine which one goes where, but there is no penalty for getting it right.
- The harp goes on the top left
- The trumpet goes on the top right
- The sword goes on the second one to the left
- The flower goes on the second one to the right
- The skull goes on the last one to the left
- The trident goes on the last one to the right
Once everything is in place, the sun will go to the bottom and reveal the spell fragment.
Umaru-San

Sleep tight, Umaru-san...
To steal the piece of the puzzle from Umaru-san, you'll need to be able to access her purse but to do that you'll first need to get her to fall asleep. You'll need to convince her to let you cook her ramen first by choosing the "What can you recommend on the menu" option and then "If I cook for you the perfect ramen, will you give me your piece of the spell?"
Now, you need to convince Ichiraku to let you cook. To do that, you need to talk to him and select "What's Umaru-san's problem with your ramen?", after which he'll tell you about the Golden Tuna and that you can use his kitchen.
You'll need to get alcohol to put in her ramen and make her fall asleep before you cook her any ramen. To obtain the sake, you'll need to beat Gino in a Bell & Bones match. Once you've defeated him, it'll seem like nothing happened because there's no unique dialogue, but you'll have the sake in your inventory. After this, go to the kitchen, start the "How To Make Ramen" tape and follow it until you reach the special ingredient and insert the sake — doing so earlier will lead to Umaru-San reacting as if you'd given her any other ramen, and forcing you to make another. Once she's asleep, it's time to crack her safe.

First, you'll need to use the File to break the four golden things holding the inner part of the purse closed to reveal the mechanism inside. After this, it'll reveal a mechanism that has five screws and a bunch of symbols — to open this safe, you need to give each of the four animals at the ends of the purse their ideal "item".
Give the monkey a banana, the bull grass, the fox a chicken, and Umaru-san the human. Once you've done this, you'll get another layer deeper into her purse, revealing a maze with a moon in the middle and a jade background — to be able to properly traverse the maze, you'll need to use the Hammer to break the jade background and reveal more paths. Break these slowly, as doing it too quickly can bug and freeze the game.
Bring out the moon right in front of the spiral dragon, and, once you do, you'll get the spell fragment.
Ernest

Whether you've been a good boy or a thief, Ernest's section is the same. Talk to the guard and tell him that you have defeated all of the Bell & Bones champions, you have the six pieces of the spell, and wish to speak to Ernest. Afterwards, follow the dialogue with Ernest until he challenges you to Bell & Bones.
Truthfully, winning or losing has the exact same result, so if you're in a rush, abandon the match by clicking the X on the top-left of the screen. Getting him to score and win won't really make him win; you need to surrender to make it quick.
After you've won or lost, Ernest'll throw you in prison, but your choice on what you want to bargain, whether you tell him to free Nick or take Nick and let you go free, will determine the ending you get. At this point, choosing to sacrifice Nick will give you the bad end, but trying to protect him will provide you with the neutral one.

Once Nick has freed you and Harold from prison, you'll need to go to the left to find the elevator and have Harold tell you to get the key from the crack. To create the fishing rod, you're going to need twine, a magnet, and a stick.
The twine is right beside Nick, and to get the magnet, you need to talk to the mice in the room, after which they'll ask you to give them wine. To get it, interact with the panel at the left and go to floor -1 and get the wine from the bottom right.
Before you leave this room, however, grab three handfuls of the millet on the floor and put them on the right side of the scale — this will open Ernest's hidden chamber, which has a stick (Elvis' microphone stand) and your lockpicks. After this, head back downstairs and give the mice the wine, and talk to Harold once you have all three items in your inventory. Pick up the fishing rod and take out the key.
Now that you've reached Ernest's study, Harold will tell you that he created Ernest's safe but will not be helping you because you didn't help him at the junkyard. So, it'll be your job to open it.

Thankfully, Ernest's safe is the easiest one to crack if you know the answer. First, use the File to break the golden lock at the side and then use the Lockpick to pull it out. Use the Screw to unscrew the screw on his right horn and click the button. Now, use the numbered section at the right and select the second one, unscrew the two screws holding the red bandanna to take it.
To make the bull open its eyes, write the name ARMUNDO on the dials, and once its eyes are open, put the red bandanna in front of its eyes. Once he does, break his teeth and take the spell pieces.
Beatrice

If you chose to be friends with Nick and tell Ernest that Nick had nothing to do with it, Nick will side with you and give you the opportunity to unlock Beatrice's heart. To do this, first, start by filing the two round parts to reveal numbers and pull the needle-like things sticking out of the heart until the numbers are 70 and 98, respectively.
Once that's done, file the golden part and grab take out the blue item jamming the gears. Use the Screw on the three screws around the puzzle to reveal even more things.
Take the Hammer and break the glass in a crescent-moon shape and use the Screw on the screw, which will make the lady open her eyes. Take the pearl from her pupil. Next, take the pearl on the pupil from the guy directly below and put both pearls in the respective areas of the bottom-right image depicting a boy and a girl.

Finally, click the fetus to unlock the final piece of the puzzle. Take the faulty wire out and connect the wires to make the pictures show, from top to bottom, a werewolf, a knife, and an infant. Every wire needs to be connected to the left-most notch, as disconnecting it from here will turn off the light.
- Connect the first wire to the third notch
- Take the second wire and connect it to the first and fourth notches
- Connect the third wire to the third notch
Once you've done that, you'll have completed the final puzzle of the Thief run! Henceforth, your actions don't matter, as your choices will have already selected an ending.
Congratulations! You've finished Whateverland whilst being the scum that Beatrice thinks you are and likely pissed off Nick along the way! If you get stuck, please feel free to leave a comment below and I'll help where I can.

GameGrin are proud to have all their articles researched, written, and edited by real people that care about gaming.


COMMENTS
Ariyai - 03:09pm, 16th July 2024
I can't seem to work out the last part of beatrice heart puzzle. i followed your instructions. could you maybe send a screenshot so i can see?